Getting Started with Onshape free CAD software: Your First Browser-Based 3D Model tutorial
Ever dreamt of bringing your ideas to life in three dimensions but felt daunted by complex software or costly installations? The world of 3D modeling is now more accessible than ever, thanks to innovative cloud-based solutions. If you’re ready to transform your concepts into tangible digital models, Onshape offers a revolutionary and user-friendly starting point. This guide will walk you through your very first steps, proving that powerful CAD design can be as simple as opening a web browser.
Why Onshape? The Future of 3D CAD
Whether you’re new to CAD or an experienced designer (especially if you’ve used tools like Onshape before!), Onshape free CAD software offers compelling advantages that make it an ideal platform for beginners and professionals alike:
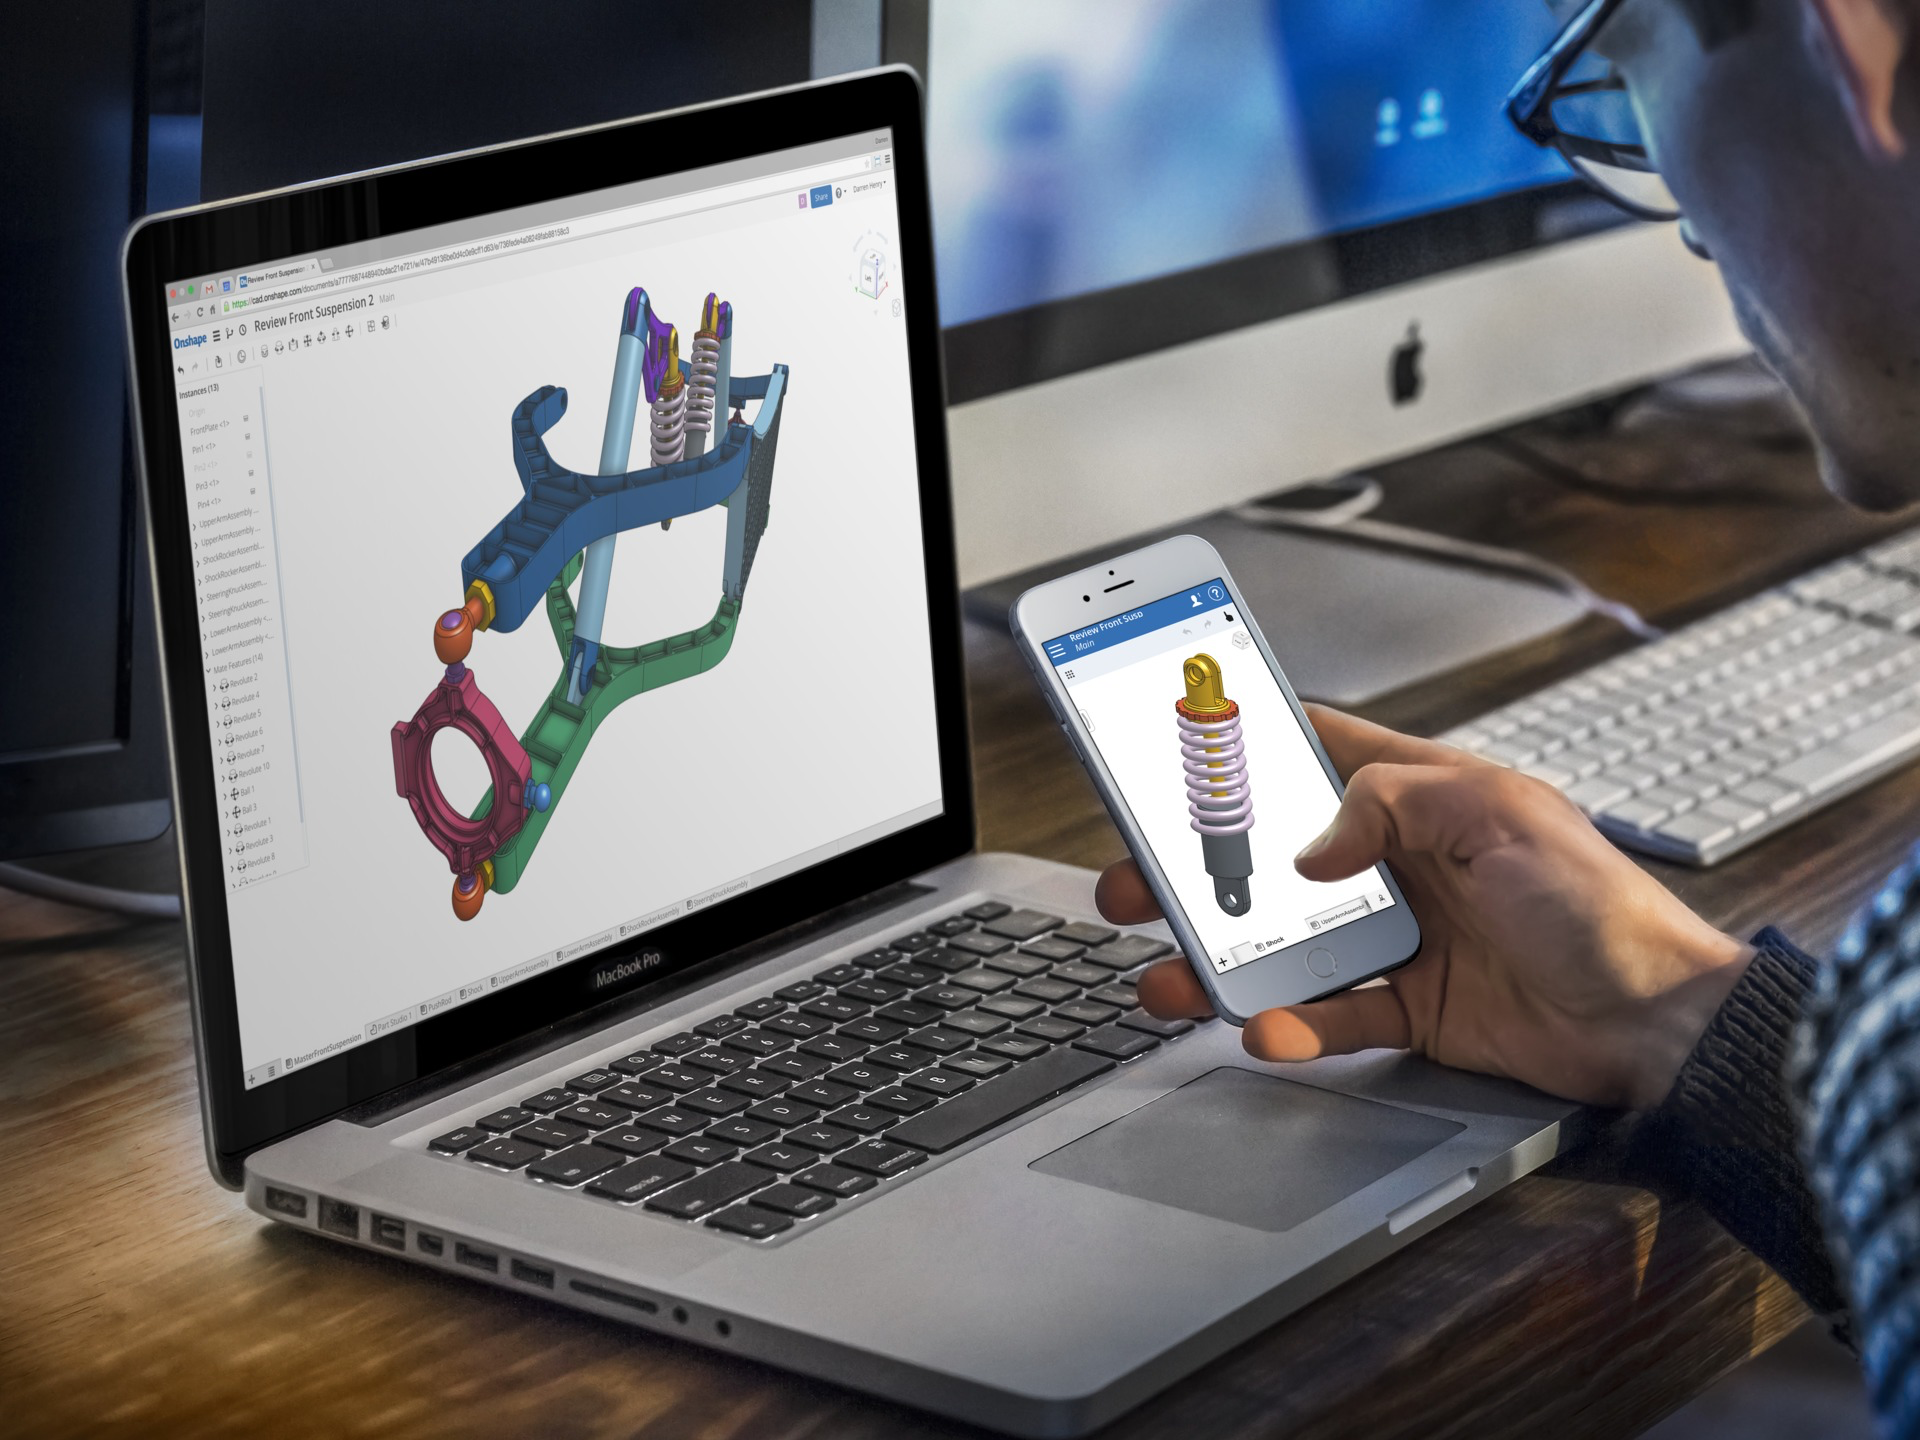
- Browser-Based Freedom: No installations, no system requirements, no hassle. Onshape runs entirely in your web browser, meaning you can design on any device (Windows, Mac, Linux, Chromebook) with an internet connection. This unparalleled accessibility liberates you from hardware constraints.
- Seamless Transition to Industry Standards: For those aiming to master industry-leading software like SolidWorks, Onshape is an invaluable stepping stone. Its user interface, feature-based parametric modeling approach, and design philosophy are remarkably similar. Learning Onshape provides a solid foundation in CAD principles that are directly transferable, preparing you for advanced tools and a career in design.
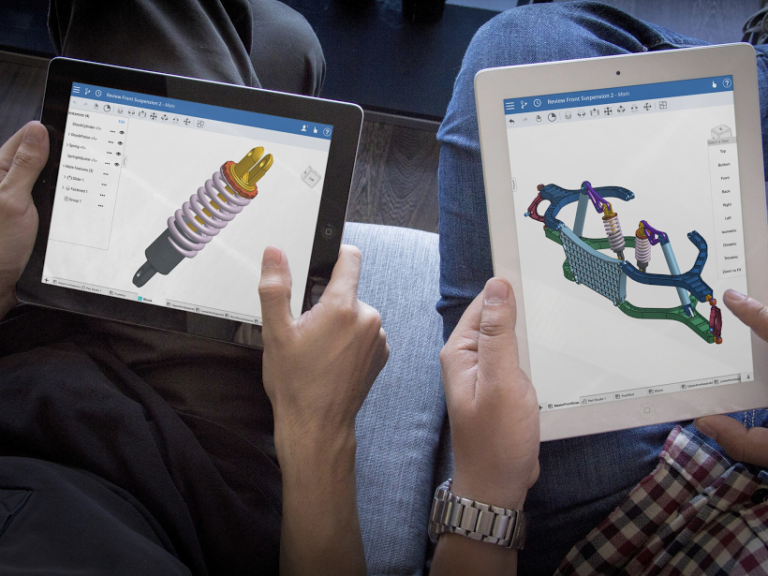
- Real-time Collaboration: Designed for teamwork from the ground up, Onshape allows multiple users to work on the same design simultaneously, seeing updates in real-time. This dynamic capability revolutionizes team projects, design reviews, and remote work, streamlining workflows like never before.
- Integrated Version Control: Say goodbye to endless “save as” files and confusion over versions. Onshape automatically saves every change, providing a complete, immutable design history. You can easily revert to any previous state, branch off new iterations without disturbing the main project, and merge successful designs effortlessly.
- Always Up-to-Date: As a cloud-based Software as a Service (SaaS) platform, Onshape updates automatically. You’ll always have access to the latest features, performance enhancements, and bug fixes without the need for manual downloads or software patches.
- Free for Hobbyists and Students: Onshape offers a generous free plan for hobbyists, students, and educators. This makes professional-grade CAD accessible to everyone, removing financial barriers for learning and personal projects.
Ready to Start? Creating Your Onshape Account
Getting started with Onshape is quick and easy. Simply visit the official website at https://www.onshape.com and sign up for a free account. Choose the ‘Public’ or ‘Education’ plan if you qualify for the free version. The registration process is straightforward, requiring just an email address to get you up and running instantly.
Understanding the Onshape Interface: Your Digital Workshop
After logging in, you’ll first land on your Onshape Documents page, which serves as your central hub for all your design projects. Click the ‘Create’ button and select ‘Document’ to start a new project. You’ll then enter the ‘Part Studio’ – the core environment where you’ll sculpt your 3D models.
Take a moment to familiarize yourself with these key areas:
- Feature List (Left Panel): This chronological list is a critical element of Onshape’s parametric design. Every operation you perform is recorded here as a “feature,” and you can click on any feature to edit its parameters at any time, allowing for flexible and non-destructive modifications.
- Graphics Area (Center): This is your main canvas, the interactive 3D space where your designs take shape. You’ll see the default ‘Origin Planes’ (Front, Top, Right), which serve as your initial surfaces for sketching and building.
- Toolbar (Top): This dynamic toolbar is your command center. Its contents change contextually based on what you’re currently doing (e.g., sketching, 3D modeling, assembly). It houses all your tools like ‘Sketch’, ‘Extrude’, ‘Revolve’, ‘Fillet’, and ‘Chamfer’.
- View Cube (Top Right): This intuitive tool allows you to quickly orient your view to standard perspectives (e.g., Top, Front, Right, Isometric) or freely rotate your model by clicking and dragging.
- Document Tabs (Bottom): Onshape documents can contain multiple Part Studios, Assemblies, Drawings, and even imported files, all organized into tabs at the bottom of the screen, keeping related data for a project neatly together.
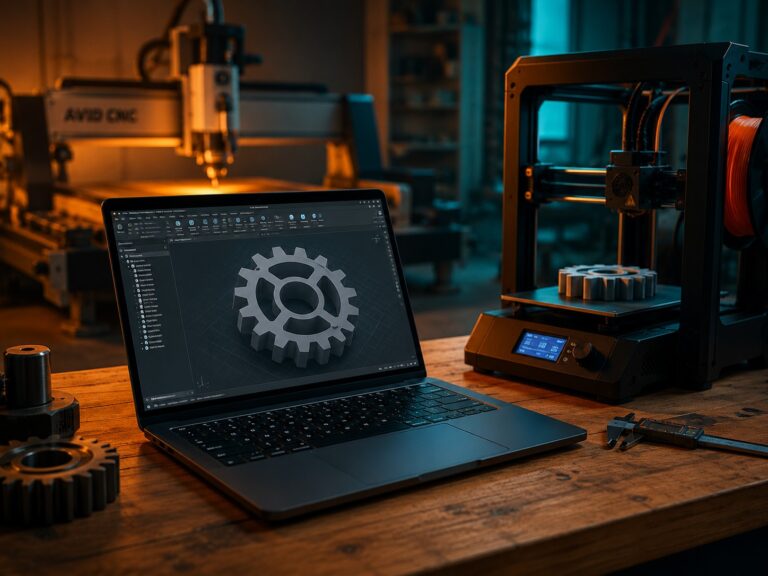
Your First 3D Model: A Simple Rectangular Block
Let’s create a foundational shape – a simple rectangular block – to get a hands-on feel for Onshape’s core principles: sketching, dimensioning, and extruding.
- Start a New Sketch:
- In your new Part Studio, select the ‘Top’ plane in the graphics area (it will highlight). This plane will be the surface for our 2D sketch.
- Now, click the ‘Sketch’ icon, usually located prominently on the top toolbar. This activates the sketching environment.
- For easier drawing, click the ‘View Normal to Sketch Plane’ icon (or simply press the ‘N’ key on your keyboard) to look directly down at your selected plane.
- Draw a Rectangle:
- From the sketch toolbar, select the ‘Corner Rectangle’ tool (it looks like a rectangle with two diagonal corners marked).
- Position your mouse cursor over the ‘Origin’ (the intersection of the red and green axes). Click once to set the first corner of your rectangle at the origin.
- Drag your mouse outward and click a second time to define the opposite corner of the rectangle. Don’t worry about precise dimensions just yet.
- Add Dimensions:
- Select the ‘Dimension’ tool from the sketch toolbar (it typically looks like a line with arrows and a number in the middle).
- Click on one of the horizontal lines of your rectangle. Move your mouse slightly, and then click again to place the dimension. A dialog box will appear; type in ‘100 mm’ and press Enter. The rectangle will adjust its size.
- Repeat this process for one of the vertical lines, setting its dimension to ’50 mm’.
- Notice how the lines of your rectangle typically change from blue to black. Black lines indicate a ‘fully defined’ sketch, meaning its size and position are completely constrained – a best practice in CAD.
- Extrude Your Sketch into 3D:
- Click the green checkmark (often labeled ‘Finish Sketch’) in the sketch dialog box to exit the sketching environment.
- In the graphics area, select your newly created 2D rectangle sketch (it should highlight).
- Now, click the ‘Extrude’ tool on the main Part Studio toolbar (it typically looks like a square being pulled into a cube).
- A dialog box for the Extrude feature will appear. For ‘Depth’, enter ’25 mm’. You can also experiment with other options like ‘Direction’ or ‘Taper Angle’.
- Once satisfied, click the green checkmark to confirm the extrusion.
Congratulations! You’ve successfully created your first 3D model in Onshape – a solid rectangular block. Use your mouse (right-click and drag to orbit, scroll wheel to zoom) or the View Cube to explore your creation from all angles.
Beyond the Basics: Expanding Your Design Toolkit
This simple block is merely the starting point. Onshape provides a comprehensive array of tools to sculpt, modify, and refine your 3D models into intricate designs. As you become more comfortable, explore these fundamental features:
- Fillet & Chamfer: Round off sharp edges (fillet) or create angled bevels (chamfer) for aesthetics, safety, or manufacturing.
- Hole: Easily add various types of holes, from simple through-holes to more complex counterbore, countersunk, or threaded holes.
- Revolve: Create features by rotating a 2D sketch around an axis. This is perfect for cylindrical parts, spherical shapes, or symmetrical profiles.
- Sweep: Extrude a 2D profile along a defined 3D path, enabling the creation of complex forms like pipes, wires, or intricate handles.
- Pattern (Linear & Circular): Efficiently duplicate features, sketches, or even entire parts in linear arrays (rows and columns) or around a circular axis, saving immense time in repetitive design tasks.
- Shell: This command hollows out a solid part, leaving a specified wall thickness. It’s commonly used to create enclosures, housings, or lightweight components.
Learn More: Essential Onshape Tutorials and Resources
To truly master Onshape, consistent practice and exploring its robust learning resources are key to propelling your design journey. Here are some indispensable starting points:
- The Official Onshape Learning Center: This is your primary hub for structured learning. It features a vast library of self-paced courses, detailed videos, and practical exercises, catering to all skill levels from absolute beginner to advanced user. Access it directly at https://learn.onshape.com/.
- Highly Recommended Courses for Beginners:
- “Onshape Fundamentals: CAD Basics”: An excellent starting point that covers the core concepts and interface.
- “Sketching Fundamentals”: Master the crucial art of 2D sketching, which is the foundation for all 3D modeling.
- “Part Design Features”: Dive deeper into specific 3D modeling commands and techniques.
- “Assemblies in Onshape”: Learn how to combine multiple parts into functional assemblies.
- Highly Recommended Courses for Beginners:
- Onshape YouTube Channel: Subscribe to the official Onshape YouTube channel for quick tutorials, feature spotlights, workflow tips, and recordings of webinars. Search for “Onshape” on YouTube for a wealth of visual learning content.
- Onshape Community Forums: Engage with a vibrant global community of Onshape users. Ask questions, share your designs, find solutions to challenges, and learn from experienced designers. You can usually find a link to the forums directly from the Onshape website.
Conclusion: Your Journey into 3D Design Starts Now!
Onshape has undeniably democratized 3D CAD, making powerful professional design tools accessible to a global audience, regardless of their hardware or location. With its unparalleled browser-based convenience, robust collaborative capabilities, and a workflow that mirrors industry-standard software like SolidWorks, it stands out as the ideal platform to embark on your 3D modeling adventure. You’ve already taken the crucial first step by creating your initial model. Now, the path ahead is clear: continue to explore its features, practice regularly, and unleash your creative potential. The only true limit is the boundary of your imagination.
Don’t let your innovative ideas remain just ideas. Ready to transform them into digital reality? Visit https://www.onshape.com today and begin your exciting journey into the future of design!